Step-by-Step Guide: Fixing Leaking Pipes to Solve Problems and Protect Your Home
Master the Art of Fixing Leaking Pipes: From Diagnosis to Repair in Easy Steps
Dealing with leaking pipes can be a frustrating experience, but fear not! With the right knowledge and a step-by-step approach, you can easily fix these leaks and prevent a host of problems in your home. In this comprehensive guide, we will walk you through the process of fixing leaking pipes, addressing the ten common problems they can solve. From preventing water damage and mold growth to improving water pressure and promoting sustainability, we will guide you toward a leak-free and problem-free home. So, let's roll up our sleeves and discover how to fix those pesky leaking pipes once and for all.
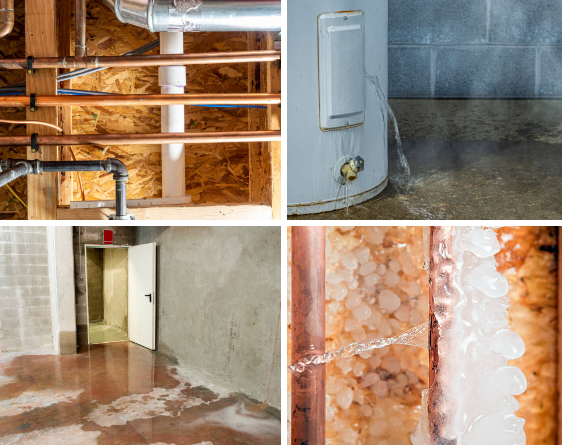
Step 1: Identify the Leak: The first step in fixing a leaking pipe is to identify the exact location of the leak. Look for visible signs of water, such as dripping or pooling. Check for dampness or discoloration on walls, floors, or ceilings. By pinpointing the source of the leak, you can proceed with the appropriate repair method.
Step 2: Turn Off the Water Supply: Before you begin any repair work, it's crucial to turn off the water supply to the affected area. Locate the main shut-off valve in your home and close it to stop the flow of water. This step will prevent further leakage and ensure a safe working environment.
Step 3: Gather the Necessary Tools and Materials: To fix the leaking pipe, you will need a few essential tools and materials. These may include pipe cutters, pipe wrenches, Teflon tape, pipe sealant, replacement fittings, and a bucket or towels to catch any residual water. Make sure you have everything you need before proceeding with the repair.
Step 4: Repair Small Leaks with Pipe Sealant or Tape: For small leaks, you can use pipe sealant or Teflon tape to create a temporary or permanent seal. Clean the area around the leak, ensuring it is dry and free from debris. Apply the sealant or wrap the Teflon tape tightly around the leaking area, overlapping it by a few inches on each side. This method will provide a quick fix until you can replace the damaged section of the pipe.
Step 5: Replace Damaged Sections of Pipe: If the leak is more severe or the pipe is severely damaged, it may be necessary to replace the affected section. Begin by cutting out the damaged portion using a pipe cutter. Measure the length of the removed section and obtain a replacement pipe of the same material and size. Apply pipe sealant to the pipe ends and insert the replacement section, ensuring a secure fit. Tighten the fittings using a pipe wrench, but be careful not to overtighten and risk damaging the pipe.
Step 6: Test for Leaks and Restore Water Supply: Once the repair is complete, it's essential to test for any remaining leaks. Slowly turn on the water supply and check the repaired area for drips or moisture. If you notice any leaks, tighten the fittings further or consider seeking professional assistance. Once you are confident that the leak has been fixed, fully restore the water supply by reopening the main shut-off valve.
Step 7: Inspect for Water Damage and Address Any Issues: After fixing the leaking pipe, thoroughly inspect the surrounding area for any signs of water damage. Look for discoloration, dampness, or mold growth. If you notice any issues, address them promptly to prevent further damage. Repair any damaged walls, floors, or ceilings, and consider using mold-resistant materials to mitigate the risk of mold growth.
Step 8: Enjoy the Benefits of a Leak-Free Home: By successfully fixing your leaking pipes, you have solved a multitude of problems and protected your home. Enjoy the peace of mind that comes with preventing water damage, improving water pressure, and maintaining a healthy living environment. Not only have you saved money on water bills, but you have also contributed to sustainability efforts by conserving water. Take pride in your newfound plumbing skills and share this knowledge with others to help them solve their leaking pipe problems too.
Fixing leaking pipes may seem daunting, but by following these step-by-step instructions, you can easily tackle this common household issue. From identifying the leak and turning off the water supply to replacing damaged sections and testing for leaks, you now have the tools and knowledge to solve the ten problems caused by leaking pipes. Remember to inspect for water damage and address any issues promptly to maintain a problem-free home. By mastering the art of fixing leaking pipes, you have not only saved money but also created a healthier, more sustainable living environment. So, roll up your sleeves, grab your tools, and get ready to enjoy the benefits of a leak-free home!
If you lack the tools or time to get this done, give us a call or fill out the form below for a FREE estimate.
You might also like